
Quick Overview
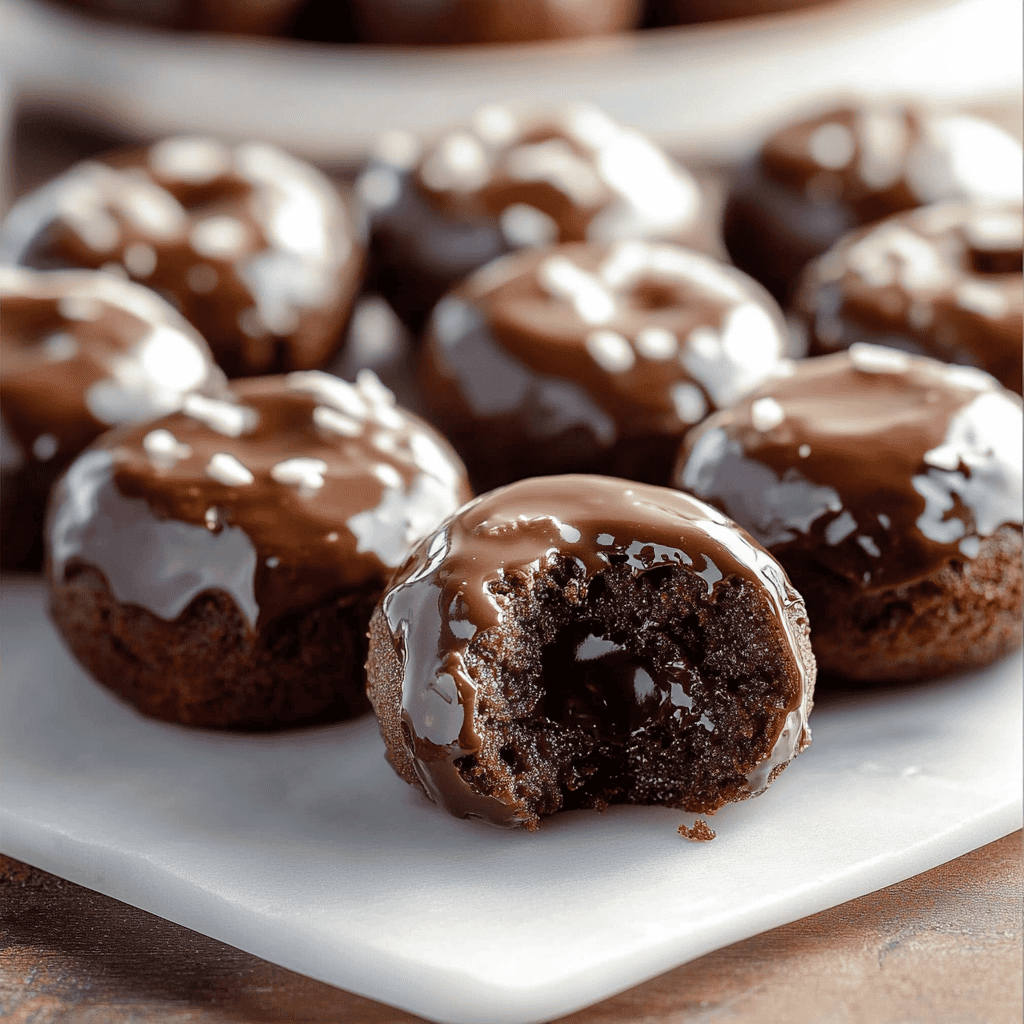
If you are searching for a delightful treat to satisfy your sweet tooth, look no further than glazed chocolate donut holes. These bite-sized wonders offer the perfect balance of rich chocolate flavor and a light, fluffy texture. Ideal for breakfast, snacks, or dessert, they can elevate any occasion with their irresistible appeal. Making these delicious treats at home is simpler than you might think. With just a few ingredients and some straightforward steps, you’ll have a batch of these delightful donut holes ready to impress family and friends.
Glazed chocolate donut holes combine the comforting taste of chocolate with a light glaze that adds just the right amount of sweetness. Whether you’re hosting a party or simply craving something sweet, these treats are sure to please everyone. Their small size makes them perfect for sharing or enjoying on your own without guilt. So grab your apron and let’s get started on making these scrumptious glazed chocolate donut holes!
Ingredient Breakdown
– **All-Purpose Flour (2 cups)**: This versatile flour forms the base of our donut holes, providing structure and a fluffy texture.
– **Granulated Sugar (3/4 cup)**: Adding sweetness balances the rich chocolate flavor while helping to create a tender crumb.
– **Cocoa Powder (1/2 cup)**: Unsweetened cocoa powder gives our donut holes their rich chocolate taste without overpowering sweetness.
– **Baking Powder (2 teaspoons)**: This leavening agent helps the donut holes rise during baking, ensuring they remain light and airy.
– **Salt (1/2 teaspoon)**: A pinch of salt enhances all flavors in the recipe and rounds out the sweetness.
– **Milk (3/4 cup)**: Milk adds moisture and richness while helping bind the dry ingredients together.
– **Eggs (2 large)**: Eggs provide structure and stability to our batter while adding richness and flavor.
– **Vegetable Oil (1/4 cup)**: This ingredient keeps the donut holes moist while contributing to their tender texture.
– **Powdered Sugar (1 cup)**: Used for glazing, this sugar creates a sweet topping that perfectly complements the chocolate flavor.
– **Vanilla Extract (1 teaspoon)**: A splash of vanilla enhances the overall flavor profile with its warm notes.
Step By Step Recipe : Glazed Chocolate Donut Holes
1. Preheat your oven to 350°F (175°C) and grease a mini muffin pan with cooking spray. This will prevent your donut holes from sticking during baking.
2. In a large mixing bowl, whisk together the all-purpose flour, granulated sugar, cocoa powder, baking powder, and salt until well combined. This ensures even distribution of dry ingredients throughout your batter.
3. In another bowl, mix together milk, eggs, vegetable oil, and vanilla extract until smooth. This mixture serves as the wet ingredients that will bring everything together in harmony.
4. Gradually add the wet mixture into the dry ingredients while stirring gently until just combined. Be careful not to overmix; some lumps are okay as they will bake out.
5. Spoon the batter into each cavity of your prepared mini muffin pan until about three-quarters full. This allows space for rising without overflowing during baking.
6. Bake in your preheated oven for 10-12 minutes or until a toothpick inserted into one comes out clean. Be vigilant not to overbake; we want soft and moist centers!
7. While baking, prepare your glaze by whisking powdered sugar with enough water or milk until smooth but thick enough to coat lightly when dipped.
8. Once baked donuts have cooled slightly in their pan for about 5 minutes, remove them carefully onto a wire rack to cool completely before glazing.
9. Dip each cooled donut hole into your prepared glaze fully coating it before placing back onto wire rack allowing excess glaze to drip off freely.
10. Let them rest briefly so that glaze can set before serving; enjoy fresh or store according to tips below!

Serving and Storing Tips
Serving Suggestions
Serve glazed chocolate donut holes on a decorative platter for an inviting presentation at parties or gatherings. They pair wonderfully with coffee or tea as an afternoon treat too! For added flair, consider dusting them lightly with cocoa powder or decorating with colorful sprinkles before serving! Children especially love these fun additions that make each bite even more enjoyable!
Storing Guidelines
To store leftover glazed chocolate donut holes properly, place them in an airtight container at room temperature for up to three days; this helps maintain their soft texture without drying out! If you wish to keep them longer than that duration—up to two weeks—consider freezing them instead! Just ensure you wrap each one individually in plastic wrap followed by aluminum foil before placing into freezer-safe bags labeled clearly so you remember what’s inside!
Mistakes to avoid
One common mistake when making glazed chocolate donut holes is overmixing the batter. Mixing too much can incorporate too much air, leading to dense and dry donuts instead of light and fluffy ones. Aim for a smooth batter without lumps, but stop mixing as soon as the ingredients combine.
Another mistake is not properly measuring ingredients. Baking requires precision, so using the wrong amount of flour or sugar can ruin your donut holes. Invest in a kitchen scale or measuring cups to ensure accuracy for perfect results every time.
Skipping the chilling step before frying is also a frequent error. Chilling the dough allows it to firm up, which helps maintain shape during frying. Without this step, the donut holes may expand excessively and lose their desired form.
Lastly, neglecting oil temperature can lead to greasy or undercooked donut holes. Use a thermometer to ensure that the oil is hot enough before adding your batter. The ideal frying temperature is around 350°F (175°C) for crispy yet tender treats.

Tips and tricks
To achieve perfect glazed chocolate donut holes, consider using cake flour instead of all-purpose flour. Cake flour has a lower protein content, which results in softer and lighter donuts that melt in your mouth. This small change can make a significant difference in texture.
Incorporating buttermilk into your recipe can enhance flavor and moisture. The acidity in buttermilk reacts with baking soda, creating tenderness and a slight tang that pairs well with chocolate. If you don’t have buttermilk on hand, you can create a substitute with milk and vinegar or lemon juice.
Don’t forget about flavor variations! While classic glazed chocolate is delicious, you can experiment with different flavors by adding spices like cinnamon or nutmeg to your batter. You could also mix in chocolate chips for an extra chocolatey treat or use flavored extracts like vanilla or almond for unique twists.
Finally, let your donut holes cool completely before glazing them. Warm donuts might cause the glaze to melt off rather than adhere effectively. Patience pays off here; allowing them to cool ensures that every bite is perfectly coated with sweet glaze.
Suggestions for Glazed Chocolate Donut Holes
Consider serving glazed chocolate donut holes with coffee or tea for an enjoyable treat during breakfast or brunch gatherings. The rich chocolate flavor pairs beautifully with both beverages, creating a delightful experience that guests will love.
For special occasions like birthdays or holidays, think about decorating your donut holes with colorful sprinkles or edible glitter. This little touch adds visual appeal and makes them more festive and fun for celebrations.
If you’re looking to make these treats healthier, try substituting some of the sugar with natural sweeteners like honey or maple syrup. While this may alter the texture slightly, it creates a more wholesome version of glazed chocolate donut holes that’s still delicious.
Lastly, consider making a larger batch and freezing some of your donut holes for later enjoyment. They freeze well; simply place them in an airtight container once cooled completely. To enjoy again, just reheat them briefly in the oven for a fresh taste anytime!
FAQs
What ingredients do I need for glazed chocolate donut holes?
To make glazed chocolate donut holes, you will need essential ingredients such as all-purpose flour, cocoa powder, sugar, baking powder, eggs, milk (or buttermilk), melted butter or oil, and vanilla extract. For the glaze, powdered sugar and milk are typically used along with cocoa powder if you want a chocolate glaze.
How do I store leftover glazed chocolate donut holes?
Store leftover glazed chocolate donut holes in an airtight container at room temperature for up to two days. If you plan to keep them longer than that, consider freezing them without glaze to preserve freshness. Once thawed, you can glaze them again before serving for optimal taste.
Can I make glazed chocolate donut holes ahead of time?
Yes! You can prepare the dough ahead of time and refrigerate it overnight before frying. This method allows flavors to develop even further while ensuring freshness when served later on. Just remember to allow adequate chilling time after mixing before frying.
What oil should I use for frying?
For frying glazed chocolate donut holes, vegetable oil or canola oil works best due to their high smoke points and neutral flavors. Avoid oils with strong tastes like olive oil since they may affect the overall flavor profile of your donuts during cooking.
Are there gluten-free options available?
Absolutely! To make gluten-free glazed chocolate donut holes, substitute regular flour with gluten-free all-purpose flour blends designed specifically for baking. Ensure that any other ingredients are also gluten-free if necessary; check labels diligently before use.
How do I know when my donut holes are cooked?
Donut holes are ready when they turn golden brown on all sides and float in hot oil while cooking evenly throughout their centers without any raw batter remaining inside after cooling down slightly once removed from heat source.
Summary
Making delicious glazed chocolate donut holes at home is easier than you think! Avoid common mistakes like overmixing and improper measurement while following helpful tips such as using cake flour instead of all-purpose flour for better texture. Don’t forget about creative serving ideas and storing tips too! With practice—and patience—you’ll impress friends and family alike with every batch made from scratch!