
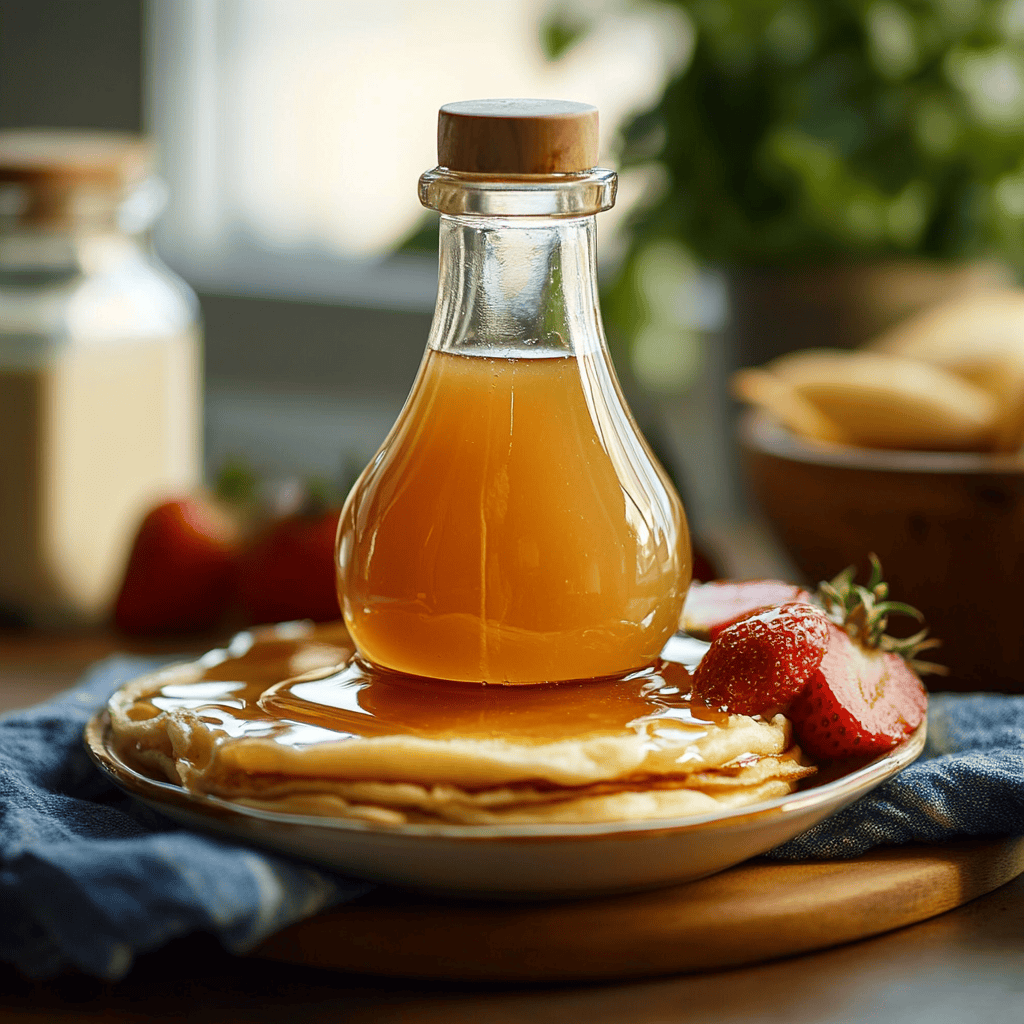
Quick Overview
If you’re looking for a delightful way to sweeten your breakfast, homemade buttermilk syrup is the answer. This simple recipe combines pantry staples to create a creamy and rich syrup that pairs perfectly with pancakes, waffles, or even ice cream. Made from scratch, this syrup not only tastes better than store-bought options but also allows you to control the sweetness and flavor. In just a few minutes, you can whip up a batch of this tasty treat that will elevate any morning meal.
Ingredient Breakdown
Buttermilk
Buttermilk is the star ingredient in this recipe. You will need 1 cup of buttermilk. It brings a tangy flavor and creamy texture to the syrup. If you don’t have buttermilk on hand, you can create a substitute using milk and vinegar or lemon juice.
Granulated Sugar
You will need 1 cup of granulated sugar to sweeten the syrup. The sugar dissolves easily in the mixture and balances out the tanginess of the buttermilk, providing a lovely sweetness that enhances your dishes.
Unsalted Butter
Use ½ cup (one stick) of unsalted butter in this recipe. The butter adds richness and depth to the flavor profile of the syrup while also giving it a smooth consistency that glides over pancakes or waffles beautifully.
Vanilla Extract
A teaspoon of pure vanilla extract will add aromatic sweetness to your syrup. The vanilla complements the other flavors perfectly and gives an inviting scent that makes breakfast feel special.
Baking Soda
You will need ¼ teaspoon of baking soda for this recipe. When combined with buttermilk, it causes bubbling which helps create a lighter texture in your syrup while balancing its acidity.
Step By Step Recipe: Homemade Buttermilk Syrup
Step 1: Combine Ingredients
In a medium saucepan, combine 1 cup of buttermilk, 1 cup of granulated sugar, ½ cup of unsalted butter, and 1 teaspoon of vanilla extract over medium heat. Stir gently until all ingredients are well mixed together and the sugar begins to dissolve.
Step 2: Heat Mixture
Continue heating the mixture on medium heat while stirring occasionally. Allow it to come to a gentle boil without letting it boil over. This process should take about 5-7 minutes as you want everything melted together smoothly.
Step 3: Add Baking Soda
Once boiling gently, add ¼ teaspoon of baking soda into the mixture while stirring constantly. Be prepared for some bubbling as it reacts with the acid in the buttermilk. Continue stirring for another minute until well combined and bubbly.
Step 4: Remove from Heat
After about one minute of bubbling, remove the saucepan from heat. Allow it to cool slightly before transferring it into a jar or container for storage. The syrup will thicken as it cools down further.
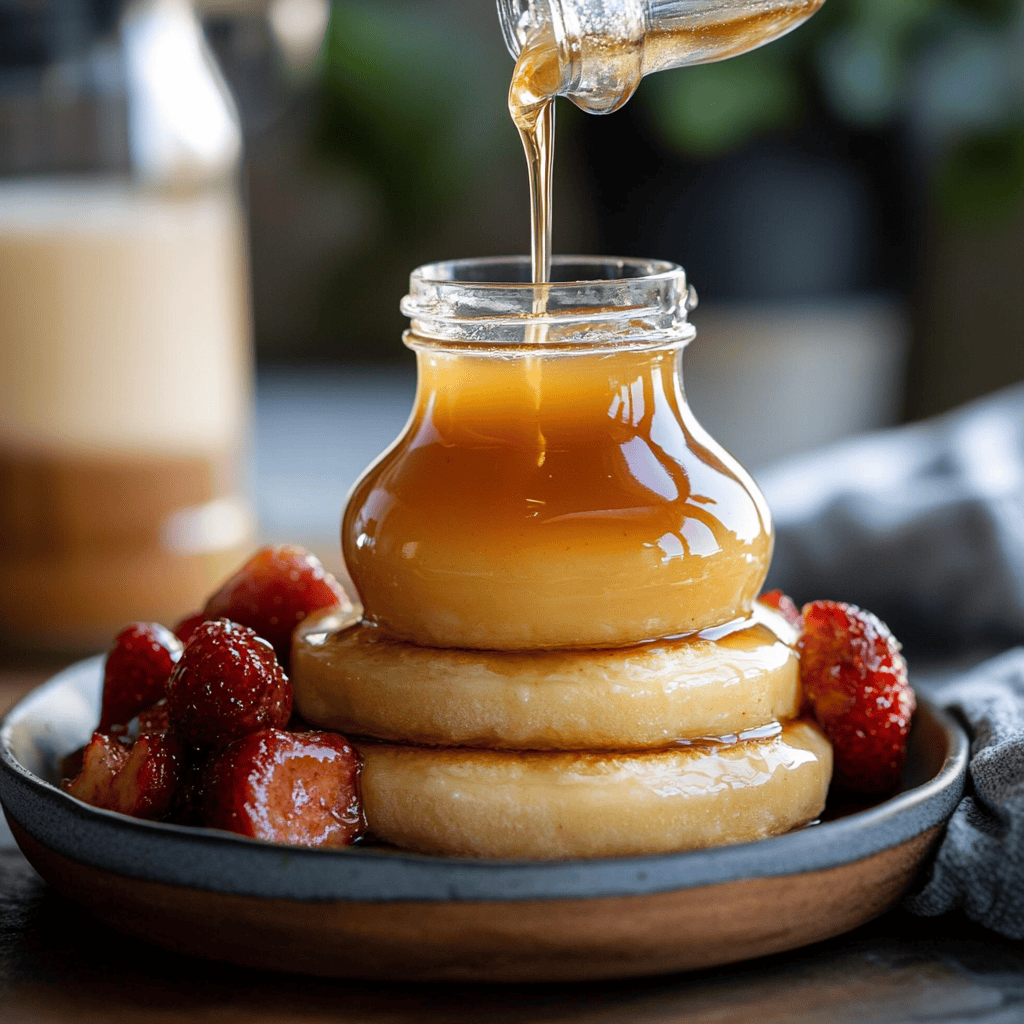
Step 5: Serve Warm or Store
Serve your homemade buttermilk syrup warm over pancakes or waffles immediately after making it or store it in an airtight container in your refrigerator for later use.
Serving and Storing Tips
Serving Tip
Serve homemade buttermilk syrup warm over fluffy pancakes or crispy waffles for an indulgent breakfast treat. This syrup also works wonderfully as an ice cream topping or drizzled over French toast for added flavor.
Storing Tip
Store leftover buttermilk syrup in an airtight container in your refrigerator for up to two weeks. When you’re ready to use it again, simply reheat it gently on low heat or in the microwave until warmed through before serving again.
This simple yet delicious homemade buttermilk syrup is sure to become a staple in your kitchen as you enjoy its rich flavor and versatility at every breakfast table!
Mistakes to avoid
One common mistake is not measuring ingredients accurately. Precise measurements are crucial when making homemade buttermilk syrup to achieve the right consistency and flavor. Use standard measuring cups and spoons to avoid any discrepancies.
Another mistake is cooking the syrup at too high a temperature. This can cause sugar to burn, resulting in a bitter taste. Always keep the heat on medium-low to allow the ingredients to blend harmoniously without burning.
Many people skip the stirring process while cooking. Continuous stirring helps prevent sugar from crystallizing and ensures an even mixture. Stir often for best results.
Using expired or poor-quality ingredients can ruin your syrup. Always check the freshness of your butter and other components before beginning. Fresh ingredients contribute significantly to the overall flavor.
Lastly, failing to store homemade buttermilk syrup correctly can lead to spoilage. Keep it in an airtight container in the fridge for optimal preservation. Make sure it cools down completely before sealing it.
Tips and tricks
To create the best homemade buttermilk syrup, start with fresh buttermilk. The tanginess of fresh buttermilk enhances the flavor profile, creating a delightful balance between sweet and tart. If you cannot find buttermilk, consider making your own by mixing milk with vinegar or lemon juice and letting it sit for a few minutes.
Experiment with different sweeteners such as brown sugar or honey for added depth of flavor. Brown sugar gives a rich caramel note, while honey adds floral undertones. Adjusting these sweeteners can cater to personal preferences while keeping the essence of homemade buttermilk syrup intact.
Don’t rush the cooking process; patience is key in achieving perfect consistency. Cook on low heat while stirring frequently, allowing all flavors to meld seamlessly over time. This method prevents burning and ensures a smooth texture.
Consider adding spices like cinnamon or vanilla extract for extra flavor nuances. A pinch of cinnamon can elevate your syrup with warmth, while vanilla extract provides a comforting aroma that complements pancakes or waffles beautifully.
Lastly, serve your homemade buttermilk syrup warm for optimal enjoyment! Warm syrup enhances its pourability and flavor release, making each bite more enjoyable when drizzled over your favorite breakfast foods.
Suggestions for Homemade Buttermilk Syrup
Pair your homemade buttermilk syrup with fluffy pancakes or golden-brown waffles for a classic breakfast treat that everyone loves. The sweet-tart flavor of this syrup beautifully complements these dishes, creating an irresistible combination that will keep diners coming back for more.
Consider using this syrup as a topping for french toast as well. The creamy nature of both dishes works together perfectly, allowing each bite to offer a satisfying blend of textures and tastes that make breakfast truly special.
You might also enjoy drizzling homemade buttermilk syrup over ice cream or yogurt for a delightful dessert twist! The rich sweetness contrasts nicely with creamy desserts, adding an unexpected yet welcomed touch that elevates simple treats into something extraordinary.
Use homemade buttermilk syrup as a glaze on baked goods like muffins or scones too! A light brush of warm syrup adds moisture and sweetness that transforms ordinary baked items into something special.
Lastly, don’t hesitate to experiment by incorporating fruits like berries into your serving suggestions! Fresh fruit can brighten up flavors and provide additional nutritional benefits alongside this indulgent syrup option.
FAQs
What is the best way to store homemade buttermilk syrup?
The best way to store homemade buttermilk syrup is in an airtight container in the refrigerator. Allow it to cool completely after cooking before transferring it into a jar or bottle with a tight seal. Proper storage helps maintain freshness and prevents spoilage, allowing you to enjoy delicious syrup for weeks.
Can I use regular milk instead of buttermilk?
While regular milk can be used in place of buttermilk, it may not provide the same tangy flavor profile essential for authentic homemade buttermilk syrup. To mimic buttermilk’s acidity, add one tablespoon of vinegar or lemon juice per cup of milk and let it sit for about five minutes before using it in your recipe.
How long does homemade buttermilk syrup last?
Homemade buttermilk syrup typically lasts about two weeks when stored properly in an airtight container in the refrigerator. Always check for signs of spoilage before use; if it smells off or has changed color, it’s best to discard it and prepare a new batch!
Can I freeze homemade buttermilk syrup?
Yes, you can freeze homemade buttermilk syrup! Pour cooled syrup into ice cube trays or freezer-safe containers for easy portioning later on. When you’re ready to use them again, simply thaw individual portions at room temperature or gently reheat them on low heat until warm.
What dishes pair well with homemade buttermilk syrup?
Homemade buttermilk syrup pairs wonderfully with various breakfast dishes such as pancakes, waffles, french toast, crepes, and biscuits. Its sweet-tart flavor enhances these foods’ taste while providing variety during breakfast time—perfect for family gatherings or weekend brunches!
Can I make this recipe dairy-free?
To make dairy-free versions of homemade buttermilk syrup, consider substituting regular butter with plant-based alternatives like coconut oil or vegan butter. Additionally, replace traditional dairy-based buttermilk with non-dairy options made from almond milk mixed with vinegar or lemon juice as mentioned earlier!
Summary
Homemade buttermilk syrup is easy to prepare if you avoid common mistakes like inaccurate measurements and high cooking temperatures. By following helpful tips such as using fresh ingredients and experimenting with flavors, you can create delightful syrups perfect for various dishes! Pair this versatile condiment with pancakes, waffles, yogurt, or even desserts for delicious enjoyment every time you serve breakfast or treats!