
Quick Overview
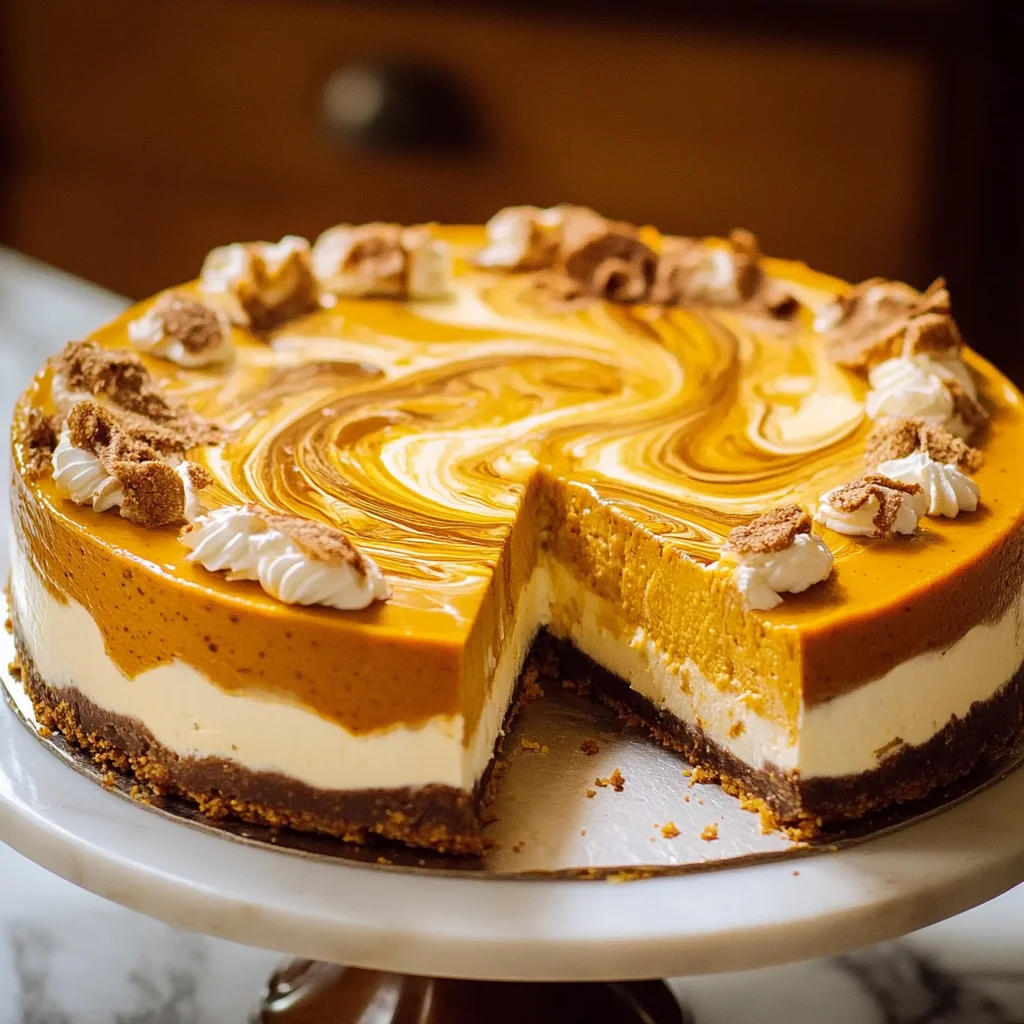
If you’re looking for a dessert that captures the essence of fall, look no further than this marbled pumpkin cheesecake. This delightful treat blends the creamy texture of traditional cheesecake with the rich flavors of pumpkin and warm spices. Perfect for Thanksgiving or any autumn gathering, this marbled pumpkin cheesecake will impress your guests and satisfy your sweet tooth. With its stunning presentation and irresistible taste, it’s bound to become a seasonal favorite.
Ingredient Breakdown
Cream Cheese
You’ll need 16 ounces of cream cheese at room temperature. This ingredient serves as the base for your cheesecake, providing its creamy texture and rich flavor. Soften the cream cheese to ensure easy mixing.
Granulated Sugar
Use 1 cup of granulated sugar to sweeten your cheesecake. This sugar balances the richness of the cream cheese while also helping to stabilize the filling.
Eggs
Incorporate 3 large eggs into your mixture. Eggs provide structure and help bind all ingredients together while also contributing to the creamy mouthfeel of the cheesecake.
Pumpkin Puree
Add 1 cup of pure pumpkin puree for that signature fall flavor. Ensure you use pure pumpkin and not pumpkin pie filling to avoid unwanted spices and sweetness.
Sour Cream
Include ½ cup of sour cream in your recipe. The sour cream adds tanginess and helps keep the cheesecake moist while adding depth to its flavor profile.
Vanilla Extract
One teaspoon of vanilla extract brings warmth and enhances all other flavors in your marbled pumpkin cheesecake. It’s a must-have ingredient for a well-rounded taste.
All-Purpose Flour
Use 2 tablespoons of all-purpose flour to help stabilize your filling. This ingredient prevents the filling from cracking during baking and helps achieve that perfect texture.
Spices
For added flavor, mix in a teaspoon each of cinnamon, nutmeg, and ginger. These spices enhance the pumpkin’s natural sweetness while giving it a cozy autumn aroma.
Step By Step Recipe: Marbled Pumpkin Cheesecake
Prepare Your Oven and Pan
Preheat your oven to 325°F (160°C). While it heats up, prepare a springform pan by greasing it lightly with cooking spray or butter. Line the bottom with parchment paper for easy removal later.
Mix Cream Cheese and Sugar
In a large mixing bowl, beat the room-temperature cream cheese until smooth using an electric mixer on medium speed. Gradually add one cup of granulated sugar until fully incorporated and fluffy—about 2-3 minutes should suffice.
Add Eggs One at a Time
Add three large eggs to your cream cheese mixture one at a time. Beat on low speed until just combined after each addition. Avoid overmixing as this can lead to cracks in your final product.
Blend in Pumpkin Puree and Spices
Once eggs are incorporated, fold in one cup of pure pumpkin puree along with cinnamon, nutmeg, and ginger spices into the mixture until evenly blended. Scrape down sides as necessary to ensure uniformity.
Incorporate Sour Cream and Flour
Add half a cup of sour cream followed by two tablespoons of all-purpose flour into your mixture. Stir gently until smooth; this step adds richness while ensuring a stable consistency during baking.
Swirl Mixture Into Pan
Pour half of your cheesecake batter into the prepared springform pan first. Then spoon half of the remaining pumpkin mixture on top before repeating layers with remaining batter—this creates that beautiful marble effect!
Bake Your Cheesecake
Place your filled springform pan into the preheated oven and bake for about 50-60 minutes or until edges are set but center is slightly jiggly. Turn off heat but leave door ajar; let it cool gradually inside for about an hour before removing from oven.
Chill Before Serving
After cooling down on a wire rack for an additional hour at room temperature, refrigerate your marbled pumpkin cheesecake for at least four hours or overnight before serving to allow flavors to meld beautifully together!
Serving and Storing Tips
Serve Chilled
Slice your marbled pumpkin cheesecake when it’s well chilled for optimal texture and flavor experience! Serve with whipped cream or caramel sauce drizzled on top for an extra touch.
Store Properly
Keep any leftovers covered tightly in plastic wrap or stored in an airtight container in the refrigerator where they can last up to five days without losing quality or flavor!
By following these simple steps and tips, you can enjoy every bite of this delightful marbled pumpkin cheesecake any time during fall or year-round!
Mistakes to avoid
One common mistake when making marbled pumpkin cheesecake is not properly prepping the pan. A springform pan is ideal, but if you don’t grease it well or line it with parchment paper, the cheesecake may stick and become difficult to remove. Always ensure your pan is ready to avoid disappointment at serving time.
Another common error is overmixing the batter. Overmixing can incorporate too much air into the cheesecake, leading to cracks during baking. Mix just until combined for a smooth texture without air bubbles. This will help create that perfect creamy consistency.
Don’t forget to watch the baking time closely. Cheesecakes are often baked until they are just set in the center. If you leave it in too long, it can dry out and lose its luxurious texture. Keep an eye on it during the last few minutes of baking for best results.
Lastly, be cautious with temperature changes. Rapid cooling can cause cracks in your marbled pumpkin cheesecake. Let it cool gradually in the oven with the door ajar for at least an hour before transferring it to the fridge. This helps maintain its shape and creamy texture.

Tips and tricks
For a delightful marbled pumpkin cheesecake, always start with room temperature ingredients. This includes cream cheese, eggs, and pumpkin puree. Room temperature items blend more easily and create a smoother batter without lumps. If you’re short on time, you can microwave cream cheese in 10-second intervals until softened but be careful not to melt it.
Consider using a water bath during baking for even cooking. Place your springform pan inside a larger pan filled with hot water before putting it in the oven. This method helps regulate temperature and prevents cracking by providing moisture in the oven environment.
When making your marble design, use a knife or skewer to swirl the pumpkin mixture into the cream cheese layer gently. Avoid over-mixing at this stage; you want distinct swirls rather than a fully blended mixture. Practice makes perfect; don’t hesitate to experiment with different swirl patterns for unique designs!
After baking, patience is key while cooling your cheesecake. Allow it to cool slowly at room temperature first before placing it in the refrigerator for chilling. This gradual cooling process helps minimize cracking and maintains its beautiful appearance.
Don’t rush through serving! Allow your marbled pumpkin cheesecake to chill overnight if possible; this enhances its flavors and improves its texture. Serve it cold directly from the refrigerator for the best taste experience.
Suggestions for Marbled Pumpkin Cheesecake
For a flavorful twist on your marbled pumpkin cheesecake, consider adding spices like cinnamon or nutmeg directly into both layers of batter. These spices complement pumpkin beautifully and enhance overall flavor complexity.
You might want to try using different types of crusts as well. A gingersnap crust adds a spicy kick that pairs wonderfully with pumpkin flavors, while an Oreo crust provides a rich chocolate contrast that many enjoy.
If you’re looking for presentation ideas, topping your cheesecake with whipped cream or caramel sauce just before serving makes an impressive touch. You could also sprinkle toasted pecans or walnuts on top for added crunch and visual appeal.
Consider pairing your marbled pumpkin cheesecake with seasonal fruits such as pomegranate seeds or fresh cranberries for color contrast and tartness that balances the sweetness of the dessert nicely.
Finally, if you’re looking to lighten up your recipe, you can substitute some of the cream cheese with Greek yogurt. This modification maintains creaminess while reducing calories without sacrificing flavor.

FAQs
What is marbled pumpkin cheesecake?
Marbled pumpkin cheesecake combines traditional cheesecake flavors with rich pumpkin puree, creating a visually appealing dessert with beautiful swirls throughout its creamy texture. The contrasting layers of classic vanilla-flavored cream cheese filling enhanced by spiced pumpkin make each bite delightful.
How long does marbled pumpkin cheesecake need to bake?
Typically, marbled pumpkin cheesecake needs about 55-70 minutes in a preheated oven set at 325°F (163°C). It’s important to monitor closely towards the end; look for slight firmness around edges while still being slightly jiggly in the center for optimal results.
Can I make marbled pumpkin cheesecake ahead of time?
Yes! In fact, making marbled pumpkin cheesecake ahead of time is recommended as chilling overnight allows flavors to meld beautifully together while improving overall texture. Store covered in refrigerator after cooling completely for best results when ready to serve.
How should I store leftover marbled pumpkin cheesecake?
Store any leftover marbled pumpkin cheesecake in an airtight container in your refrigerator for up to five days. For longer storage periods beyond that timeframe, consider freezing individual slices wrapped tightly in plastic wrap followed by aluminum foil.
What toppings go well with marbled pumpkin cheesecake?
Great toppings include whipped cream dollops, caramel drizzle, or even chocolate ganache for added richness! Fresh fruit like cranberries or pomegranate seeds also provide lovely contrast; toasted nuts add nice crunch too!
Is there a gluten-free option available?
Yes! You can easily make gluten-free variations by substituting regular cookies used in crust recipes with gluten-free alternatives like almond flour or gluten-free graham crackers instead without compromising flavor quality!
Summary
In summary, creating an unforgettable marbled pumpkin cheesecake involves avoiding common mistakes such as improper pan prep and overmixing ingredients while incorporating helpful tips like using room temperature components and practicing patience during cooling phases after baking. Experimenting with various crusts and toppings can elevate your dessert even further! Lastly, remember that making this treat ahead of time enhances flavor depth—perfect for special occasions or cozy gatherings!